- Published on
Setup Next.js with Postgres, Prisma and Docker Compose locally
- Authors
Introduction
In the fast-paced realm of web development, creating a robust and scalable application requires a solid foundation. For developers diving into the world of Next.js, the importance of seamlessly integrating databases cannot be overstated. Enter Postgres and Prisma, two powerful tools that, when combined with Docker Compose, create a development environment that is not only efficient but also replicable across different systems.
I know from my own experience that it can be a struggle to set it all up. That's the reason why I decided to write this blog post here to provide you with a small guide so that you don't have to go through too much trouble anymore. Before we start, let's take a look at the twin pillars of efficiency and consistency, which are the main reasons why we're setting this up.
Efficiency in development
One of the primary advantages of this setup is the elimination of tedious configuration processes. With Docker Compose orchestrating the containers, developers can encapsulate all dependencies – including the Next.js application and Postgres database – into a single, reproducible environment. This means no more hours wasted on troubleshooting environment-specific issues or manually configuring databases.
Consistency across environments
Consistency extends beyond just the development phase. With a well-structured local setup, the transition from development to testing and eventually deployment becomes a seamless process. Developers can have confidence that the application behaves predictably in different environments, mitigating the risk of unexpected issues cropping up in production.
Ease of collaboration
In a collaborative development environment, the ability to share a consistent development setup becomes a game-changer. When team members can effortlessly clone the project repository and bring up the entire environment with a single command, the collaboration becomes more fluid. No longer do developers need to spend precious time troubleshooting setup issues or dealing with discrepancies between individual machines.
Setup
Next.js
First of all, we're going to create a new Next.js project with the following command:
npx create-next-app@latest
Then just follow the instructions and choose your preferences for the project. I'll use Typescript and npm in my example here.
When the setup is done, navigate into your project and run the dev command to spin up the development server.
Postgres
To set up a Postgres database you have many different options.
The most common ones are to install it locally on your machine or run it inside a docker container. Because we want to erase the It works on my machine problem, we'll spin it up inside a docker container.
There are also different ways to let the Postgres database run inside a docker container. I'll provide you with a quick one in this tutorial. Of course, you can orchestrate the Next.js App and Postgres database in a docker-compose file, but I think this is content for a blog post on its own because there is a bit more configuration required that would exceed the focus of this post here. Keep your eyes open, I'm already preparing such a post where we discover the world of docker compose!
This setup requires you to have Docker installed on your machine.
Go to your package.json and add a new entry inside the scripts section:
"start:db": "docker run --rm -p 5432:5432 -e POSTGRES_HOST_AUTH_METHOD=trust postgres"
If you now run our new command, a docker container with a Postgres database will be running and listening for traffic on port 5432.
What's special about this way is that we're configuring a password right here. This is because we're using POSTGRES_HOST_AUTH_METHOD=trust here which basically allows every incoming connection. Since we're only using this locally on our machine, this is perfectly fine.
This way is great if you just need to spin up one container quickly and that's it.
Prisma
If you're not familiar with Prisma or ORM at all, here's a quick overview of why you should care:
- An ORM provides a higher-level, object-oriented abstraction over the relational database, allowing developers to work with objects in their programming language rather than dealing directly with database tables and SQL queries. This abstraction simplifies code and makes it more intuitive for developers.
- ORM tools can significantly reduce the amount of boilerplate code needed for database interactions. This can lead to faster development cycles since developers can focus more on business logic and less on low-level database operations.
- ORM tools often handle parameterized queries and input validation automatically, reducing the risk of SQL injection attacks. This is because ORM libraries generally use parameterized statements, which helps prevent malicious SQL code injection.
- ORM tools can automate the creation and modification of database schemas based on changes to the application's data model. This can simplify the process of evolving the database schema over time.
There are many different ORM tools out there nowadays, but my choice is Prisma in this tutorial. It's easy to use and especially fast to set up.
First, let's add it as a dependency to our project:
npm i prisma
After installing, we initialize it with:
npx prisma init
This creates a new prisma directory with your Prisma schema file. When you open the prisma.schema file inside that directory it should look something like this:
generator client {
	provider = "prisma-client-js"
}

datasource db {
	provider = "postgresql"
}
It also generates a new .env file with an environment variable called DATABASE_URL. Prisma needs this of course to connect to our database.
If you're running the Postgres database with the npm command like me, then your .env should look like this
DATABASE_URL="postgresql://postgres@localhost:5432/postgres?schema=public"
Of course, we don't want to commit our .env file to our git repository. Let's open the existing .gitignore file and add .env to it.
Great! Now we're ready to create models of our data and feed our database with some data.
Working with our database
Create first model
After setting it all up it's now time to work with some data. First of all, we create our first model inside our schema.prisma file:
generator client {
	provider = "prisma-client-js"
}

datasource db {
	provider = "postgresql"
}

model User {
	id      Int @id @default(autoincrement())
	email   String @unique
	name    String?
}
Our User model represents the User table in our Postgres database and its properties represent the individual columns. To let our database know about that new table, we have to run a migration to add a new table to the database. We accomplish it with this command:
npx prisma migrate dev --name init
When you take a look into your prisma directory now, you see a new folder called migrations. In that folder should be another folder with a timestamp and the name of our migration. Inside this folder is a SQL file that looks like this:
-- CreateTable
CREATE TABLE "User" (
	"id" SERIAL NOT NULL,
	"email" TEXT NOT NULL,
	"name" TEXT,

	CONSTRAINT "User_pkey" PRIMARY KEY ("id")
);

-- CreateIndex
CREATE UNIQUE INDEX "User_email_key" ON "User"("email");
Here comes the real power of an ORM into play. Instead of writing the SQL queries yourself, you use an easier and human-readable syntax to work with your database. The ORM does the heavy lifting for you. Your code becomes less error-prone and more maintainable.
Prisma client
The migration command also installs the @prisma/client package, which we will need later in our code to work with our database.
In your src directory, create a new folder called lib, and inside that folder another one called db. In the db folder create a new file prisma.ts. Add this code to the new file:
// @ts-nocheck
import { PrismaClient } from '@prisma/client';

let prisma: PrismaClient;

if (process.env.NODE_ENV === 'production') {
	prisma = new PrismaClient();
} else {
	if (!global.prisma) {
	global.prisma = new PrismaClient();
}
	prisma = global.prisma as any;
}

export default prisma;
If you're familiar with OOP design patterns, you should have heard of the Singleton pattern, which is often used for establishing database connections and to make sure that only one connection is open and shared across the application. The approach above is similar to the pattern but in a more functional way. When we want to interact with our database, the exported PrismaClient will be our interface for that. So we need to import the client from this file whenever we want to interact with our database.
API setup
For the sake of this tutorial, I think it's enough to create a few API endpoints on our Next.js server and test them via an HTTP client like Postman.
Because we're using the app router in this tutorial, we need to create a new folder called api inside the app directory. Let's create a new folder called users in the new directory. This will be the path to our endpoint api/users. Inside the users folder create a route.ts file where we configure the different route handlers.
Adding data
To handle different requests in this endpoint like POST and GET, we just need to export a function with the name of the individual http verb. For adding data to our database we add this code to our route.ts file:
import prisma from "@/lib/db/prisma";
import { User } from "@prisma/client";
import { NextRequest, NextResponse } from "next/server";

type CreateUserReqBody = Omit<User, "id">;

export const POST = async (req: NextRequest) => {
	const body: CreateUserReqBody = await req.json();

	if (!body.email) {
		return NextResponse.json("Please provide an email", { status: 400 });
	}

	try {
		const user = await prisma.user.create({
			data: {
				email: body.email,
				name: body.name,
			}
		});
		return NextResponse.json({ user });
	} catch (error) {
		console.error(error);
		return NextResponse.json("Something went wrong creating the user", { status: 500 });
	}
}
Pretty straightforward right? We extract the request body from our request and make a short validation because the email is required. After that, we're calling the prisma client we created earlier in the lib folder and adding the request body to create a new row inside our User table. We also imported the User model we generated earlier. That's also pretty powerful because you have one single source of truth whenever you make changes to the User model.
When we try to make a request via Postman, you should get a response like this:
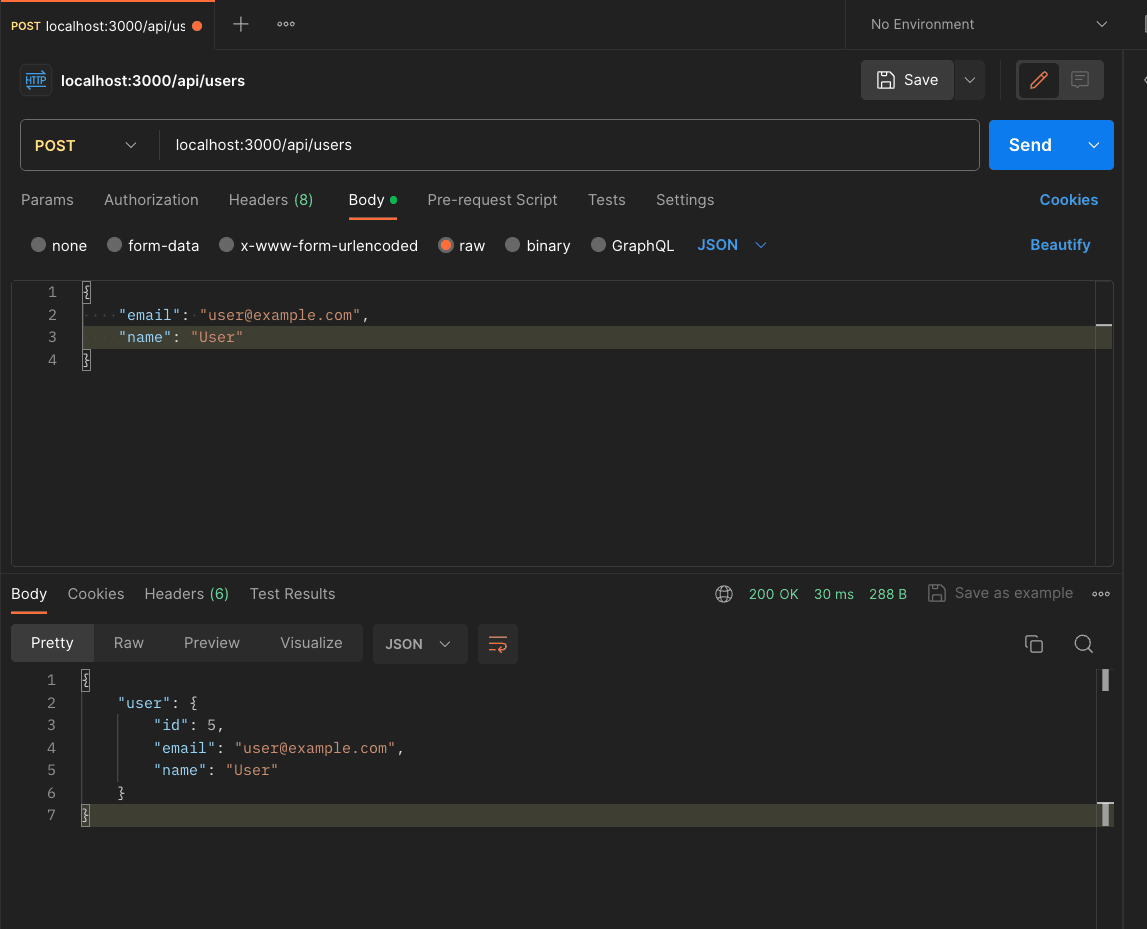
Feel free to play around with the request. Don't add an email field to the request body, provide an email that is already signed up, ... See what happens!
PRO TIP: Use prisma studio!
One powerful tool that comes with prisma is prisma studio, which is a GUI for your database. Just type npx prisma studio in a new tab in your terminal and the GUI should open on localhost:5555. You can explore and work with your data also through the GUI. I think it's very handy, especially when you're developing!
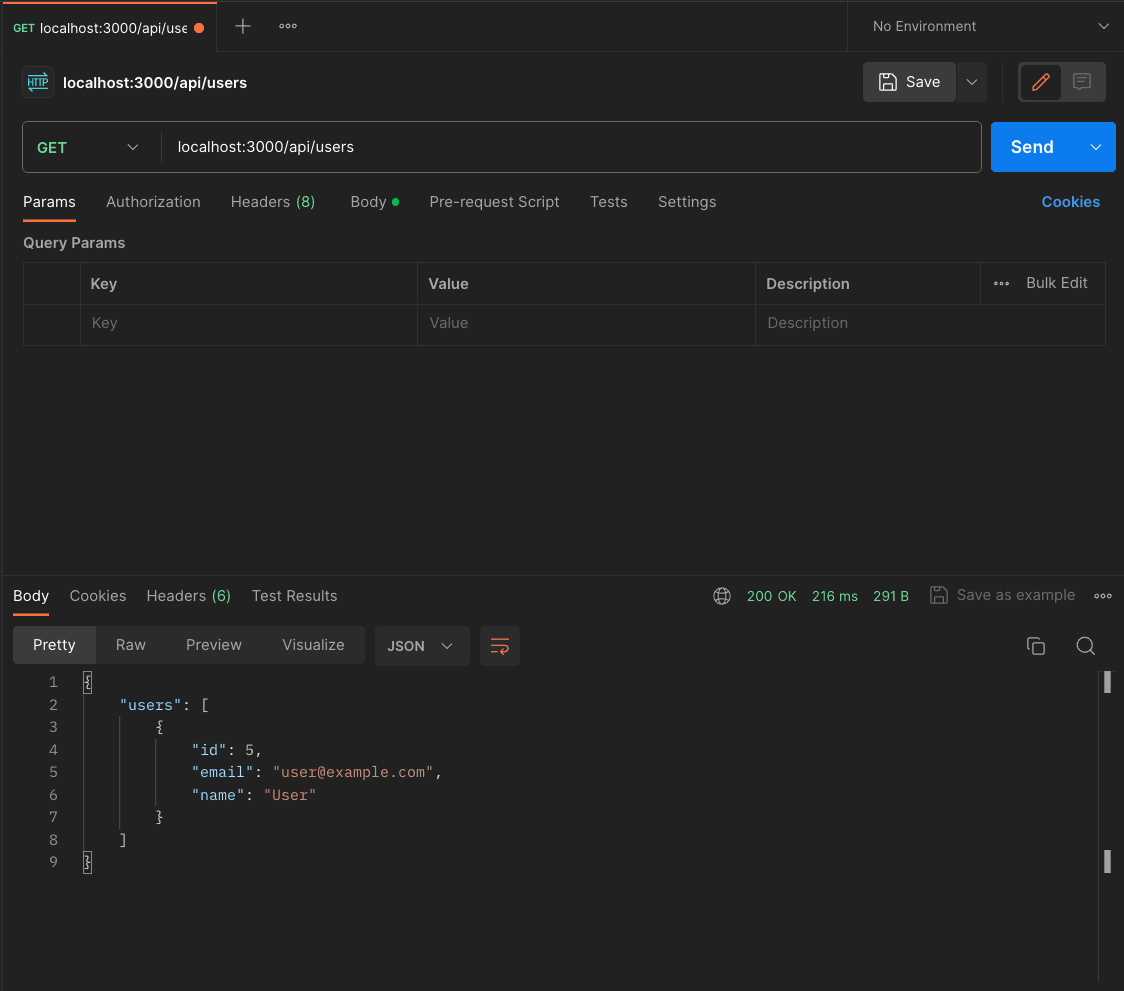
Reading data
Now, let's read the data we've created. We spin up an endpoint that returns all users that are stored in the database. In the same route.ts file add this code:
export const GET = async (req: NextRequest) => {
	try {
		const users = await prisma.user.findMany();

		return NextResponse.json({ users });
	} catch (error) {
		console.error(error);

		return NextResponse.json("Something went wrong finding users", { status: 500 });
	}
}
The response should look similar to this:
Updating data
For the next two operations we need to create a new directory inside our users folder. Create a new folder called [id] in the users folder and add a route.ts to the new folder. That's because we need an id for the updating and deletion process in order to know which exact user to update or to delete. The brackets signalize Next.js that this is a dynamic route parameter.
When you've done that, add this code to the new route.ts:
import prisma from "@/lib/db/prisma";
import { User } from "@prisma/client";
import { NextRequest, NextResponse } from "next/server";

type UpdateUserReqBody = Partial<Omit<User, "id">>;

export const PATCH = async (req: NextRequest, route: { params: { id: string }}) => {
	const body: UpdateUserReqBody = await req.json();
	const { id: userId } = route.params;

	try {
		const user = await prisma.user.update({
			where: { id: parseInt(userId) },
			data: { ...body }
		});

		return NextResponse.json({ user });
	} catch (error) {
		console.error(error);

		return NextResponse.json("Something went wrong updating the user", { status: 500 });
	}
}
After requesting the user updates with Postman, your response should look similar to this:
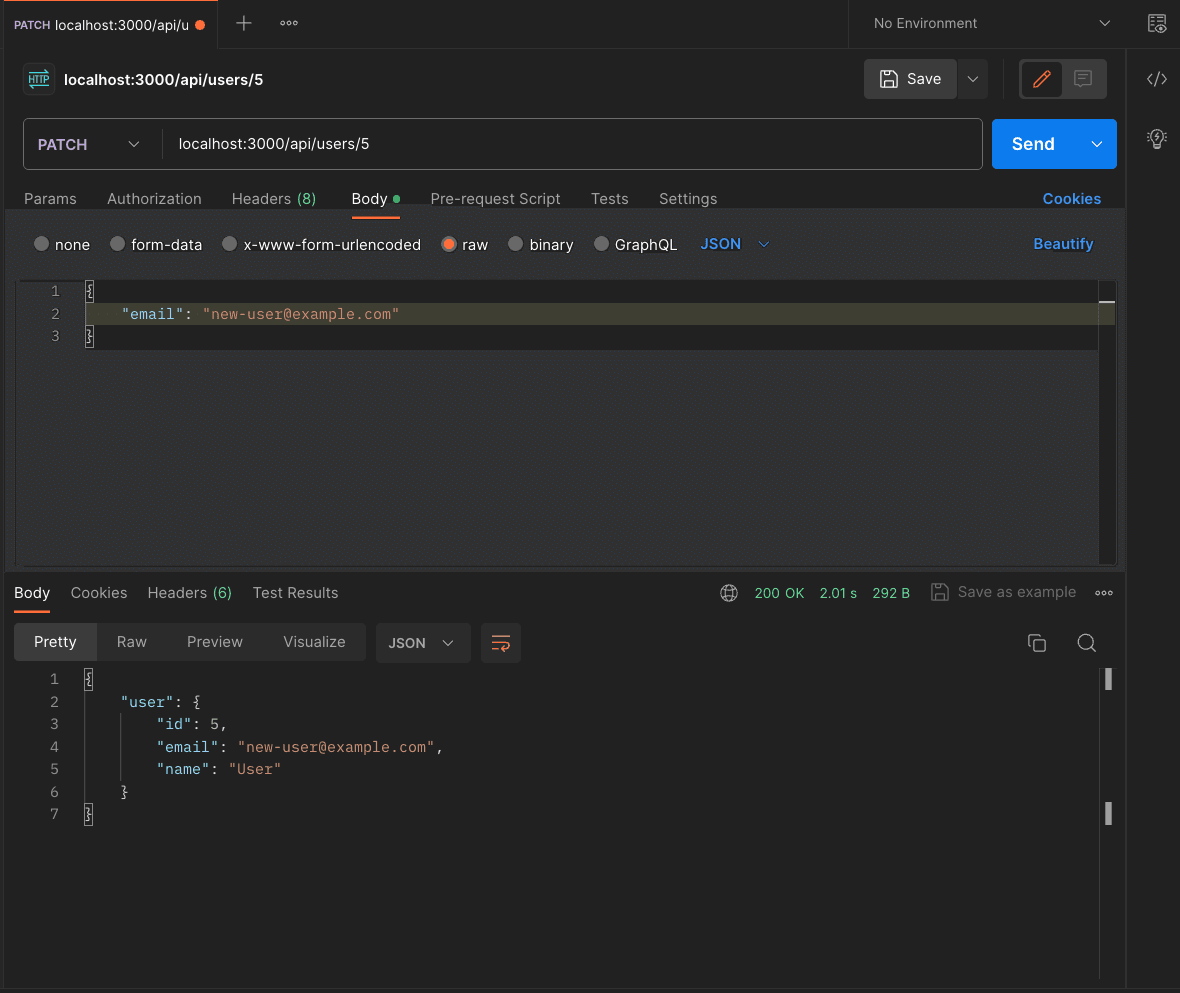
Again, feel free to play around with the request and see what happens.
Deleting data
The process for deleting a user is pretty similar to updating. To our route.ts file we insert this code:
export const DELETE = async (req: NextRequest, route: { params: { id: string }}) => {
	const { id: userId } = route.params;

	try {
		const user = await prisma.user.delete({
			where: { id: parseInt(userId) },
		});

		return NextResponse.json({ user });
	} catch (error) {
		console.error(error);

		return NextResponse.json("Something went wrong deleting the user", { status: 500 });
	}
}
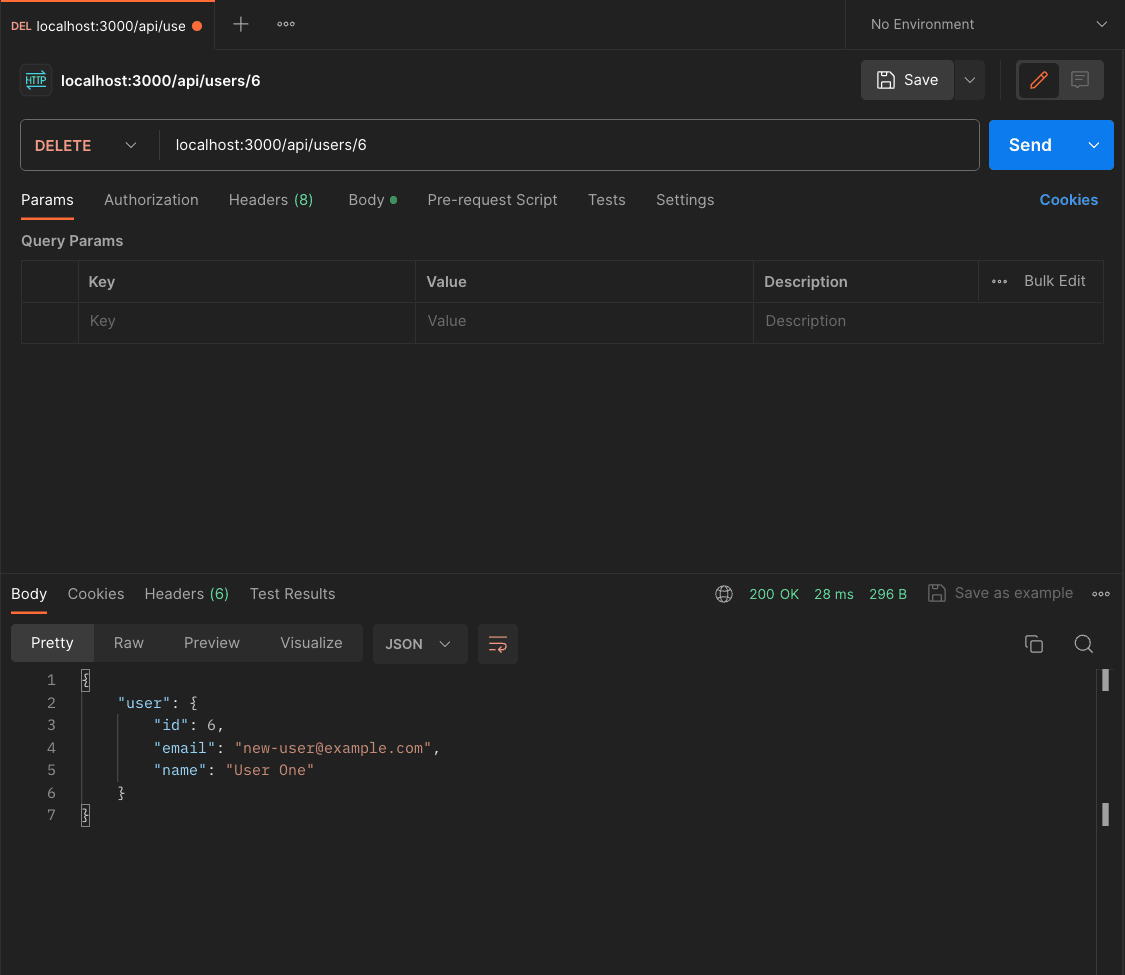
After a successful deletion we should receive the deleted user in our response:
Conclusion
As you have seen, interacting with our database using Prisma is pretty straightforward. The queries in this tutorial are pretty simple of course because the focus is more on the setup itself. In real world projects, queries can become complex because often you need data from different tables, join them together, filter certain data out or use any other constraints. I will also prepare a more comprehensive deep dive on Prisma itself and try to be as realistic as possible in that blog post.
Cheers,
Jean-Marc